YOLOv8n
This guide converts a custom YOLOv8n PyTorch model into an INT8 BModel for the CV184x processor, then imports and activates it from OVIS Web.
The example uses a fixed 640 x 640 tensor size. Keep the export size and --input_shapes value identical. A different fixed size is valid when the model and every conversion step use that same size.
The workflow has two parts:
- Export and compile the model on a development computer.
- Upload, validate, and activate the BModel in OVIS Web.
Before You Start
Prepare the following:
- Trained YOLOv8n weights, named
best.ptin this example. - A representative test image,
test.jpg. - A calibration dataset from the intended camera and deployment environment.
- The Ovis SDK, which provides the YOLOv8 export script.
- The class names in training-index order.
For example, if person is class 0 and helmet is class 1, enter them in that order when importing the model.
Export PyTorch to ONNX
Run this step in the Python environment used to train the model, or in another environment with matching Ultralytics dependencies.
Clone Ultralytics and the Ovis SDK if they are not already available:
cd ~/projects
git clone https://github.com/ultralytics/ultralytics.git
git clone -b ovis-master https://github.com/aimorelogy-ovis/aimorelogy-ovis-sdk.git
Install Ultralytics, then copy the Ovis export script into the repository:
cd ~/projects/ultralytics
pip install -e .
cp ~/projects/aimorelogy-ovis-sdk/tdl_sdk/tool/yolo_export/yolov8_export.py .
Place best.pt in the current directory and export a fixed-shape ONNX model:
python yolov8_export.py \
  --weights ./best.pt \
  --img-size 640 640
For a 1080p video stream, consider using a 384 x 640 model input size. This reduces redundant computation and can improve inference speed:
python yolov8_export.py \
  --weights ./best.pt \
  --img-size 384 640
When using this size, also change --input_shapes and the model dimensions in all subsequent conversion steps to 384 x 640.
The Ovis script changes the YOLOv8 detection head to produce six raw output branches. The device-side YOLOv8 decoder expects this output contract. Do not replace it with an export that embeds decoding or NMS.
The command prints the saved ONNX path. The remaining examples assume the file is best.onnx.
Create a conversion workspace:
mkdir -p ~/projects/yolov8n-export
cp ./best.onnx ~/projects/yolov8n-export/
cp /path/to/test.jpg ~/projects/yolov8n-export/test.jpg
Prepare the Conversion Environment
Install Docker on the development computer. The Ovis TPU Docker image contains the ONNX-to-MLIR converter, calibration tool, and CV184x compiler.
Pull and start the image:
docker pull aimorelogy/ovis-tpu-docker:latest

docker run -it --rm --privileged \
  -v /dev:/dev \
  -v ~/projects:/workspace \
  -w /workspace \
  aimorelogy/ovis-tpu-docker:latest \
  /bin/bash
Files under /workspace remain on the host after the container exits. Run the following conversion commands inside the container:
cd /workspace/yolov8n-export
Convert ONNX to MLIR
YOLOv8 uses RGB input scaled by 1 / 255. This example applies no mean subtraction:
- Mean:
0.0, 0.0, 0.0 - Scale:
0.0039216, 0.0039216, 0.0039216
Convert the ONNX model:
model_transform.py \
  --model_name yolov8n \
  --model_def best.onnx \
  --input_shapes '[[1,3,640,640]]' \
  --mean 0.0,0.0,0.0 \
  --scale 0.0039216,0.0039216,0.0039216 \
  --keep_aspect_ratio \
  --pixel_format rgb \
  --test_input ./test.jpg \
  --test_result yolov8n_top_outputs.npz \
  --mlir yolov8n_640_640.mlir
The command generates yolov8n_640_640.mlir, yolov8n_top_outputs.npz, and yolov8n_in_f32.npz. The NPZ files are used as reference data during BModel compilation.
Compile an INT8 BModel
Generate the calibration table
Use 100 to 1,000 representative images when possible. Images from the real camera, lighting, distance, and target distribution usually produce better quantization results than a generic dataset.
run_calibration.py yolov8n_640_640.mlir \
  --dataset /workspace/yolov8n-export/sensing_dir/images \
  --input_num 100 \
  -o yolov8n_cali_table
If fewer than 100 valid images are available, add more samples or set --input_num to the available count.
Generate the BModel
Compile the model for CV184x with symmetric INT8 quantization:
model_deploy.py \
  --mlir yolov8n_640_640.mlir \
  --quant_input \
  --quant_output \
  --quantize INT8 \
  --calibration_table yolov8n_cali_table \
  --processor cv184x \
  --test_input yolov8n_in_f32.npz \
  --test_reference yolov8n_top_outputs.npz \
  --tolerance 0.85,0.45 \
  --model yolov8n_cv184x_int8.bmodel
Confirm that the artifact exists:
ls -lh yolov8n_cv184x_int8.bmodel
Only use a BModel compiled with --processor cv184x on Ovis. Keep best.pt, best.onnx, the calibration table, and the conversion log with the generated file so the artifact can be reproduced.
Deploy the BModel with OVIS Web
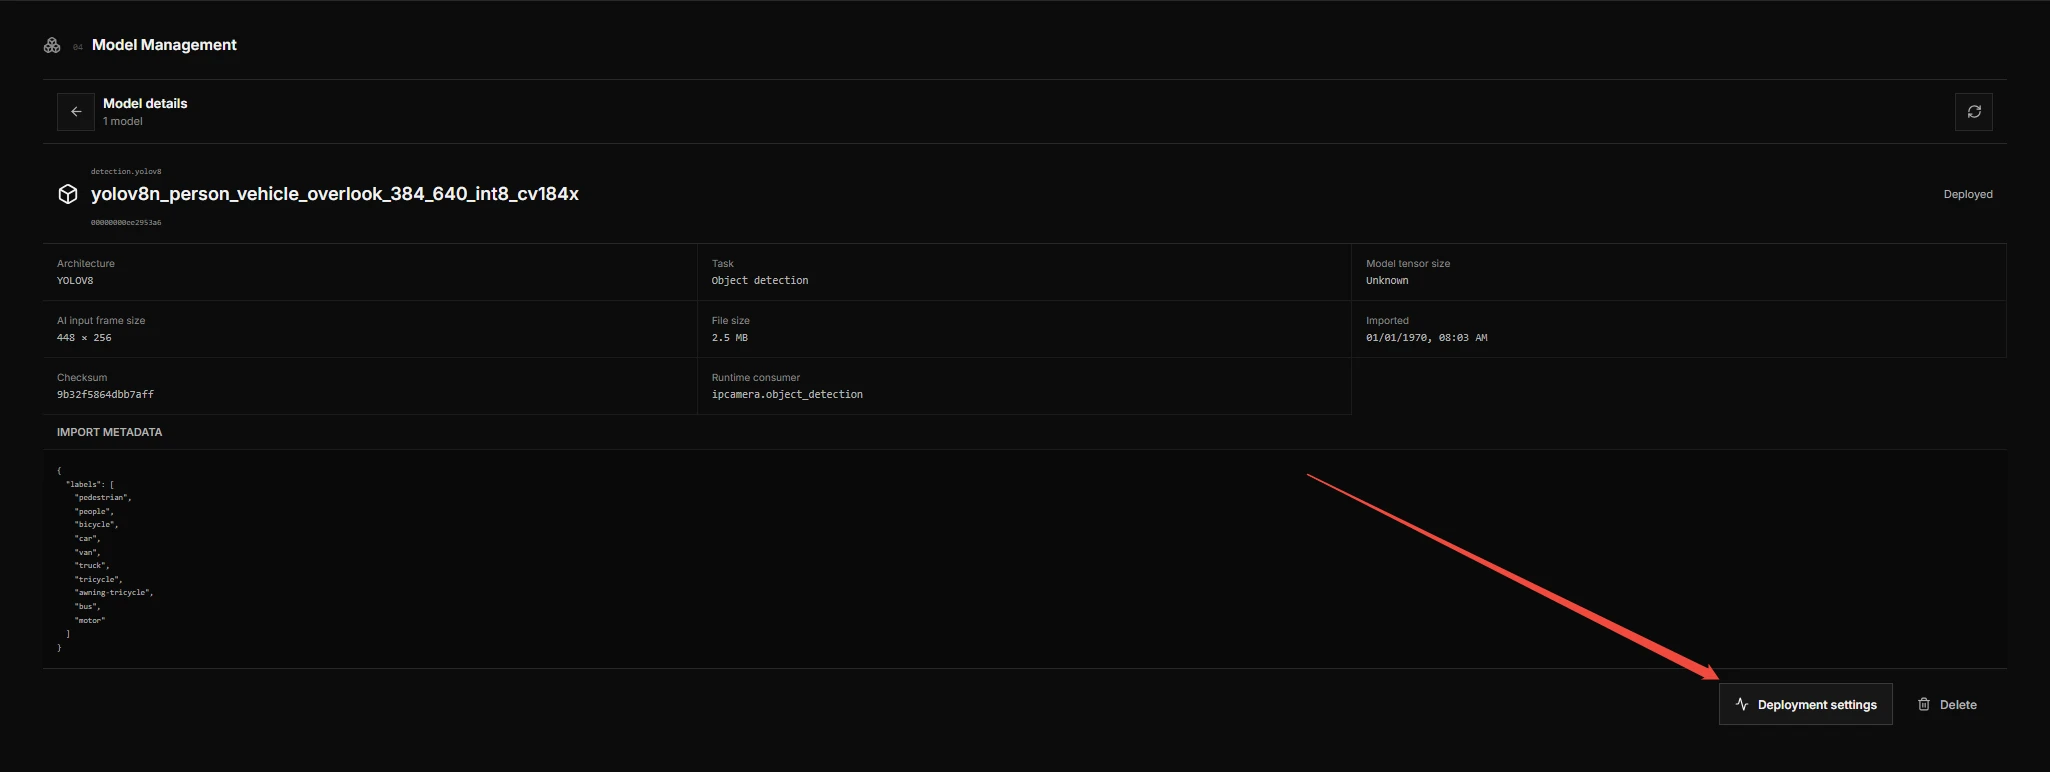
You do not need to register a model ID, edit model_factory.json or param_config.ini, add a firmware resource, or rebuild the Ovis SDK. OVIS Web uploads the model metadata and BModel to Ovis Manager, which creates the device-side model configuration.
Connect to Ovis
- Open OVIS Web in a supported Chromium browser.
- Search for the device and connect to it.
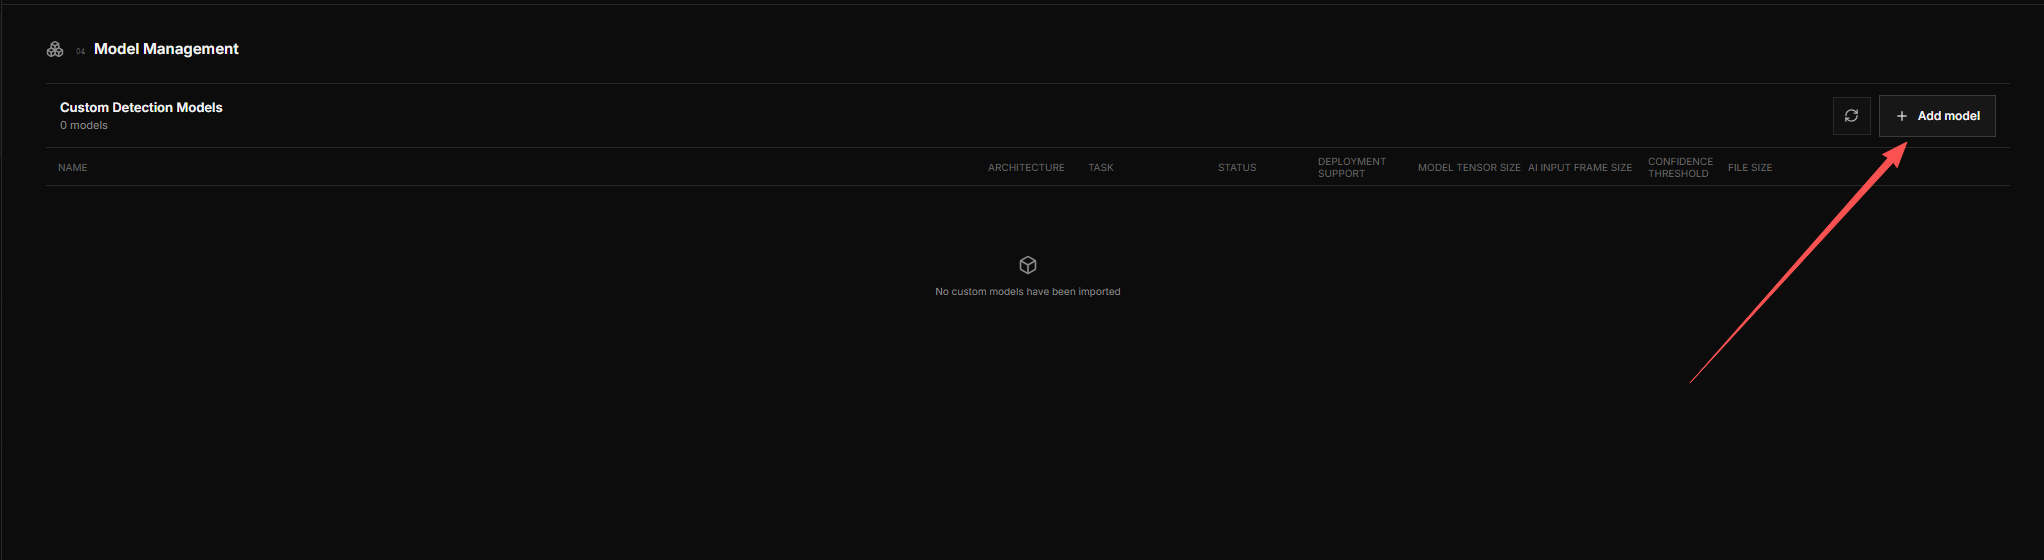
- Open Model Management on the configuration page.
Save or discard any pending device-configuration changes first. OVIS Web blocks model activation and deactivation while the main configuration draft has unsaved changes.
Import the model
- Select Add Model.
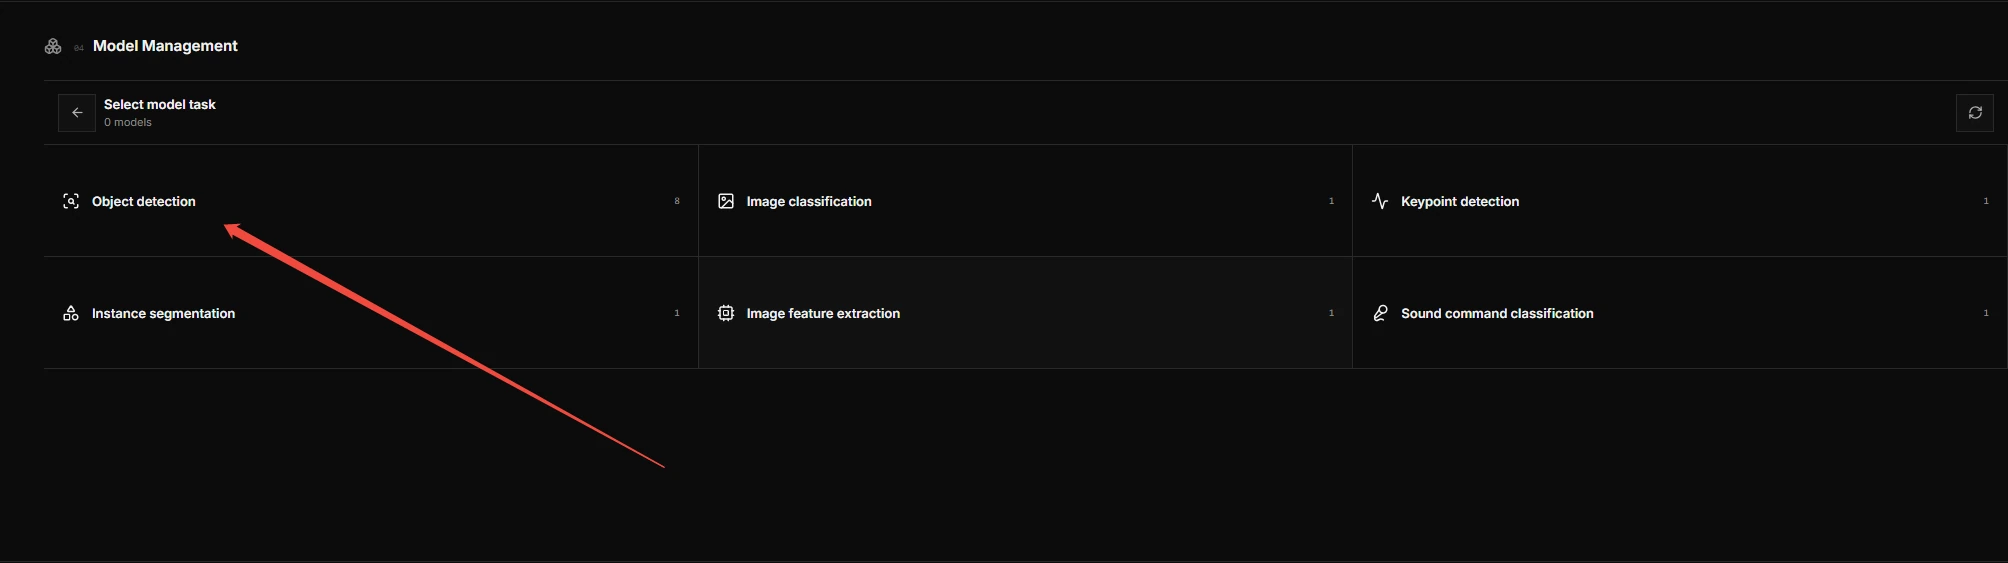
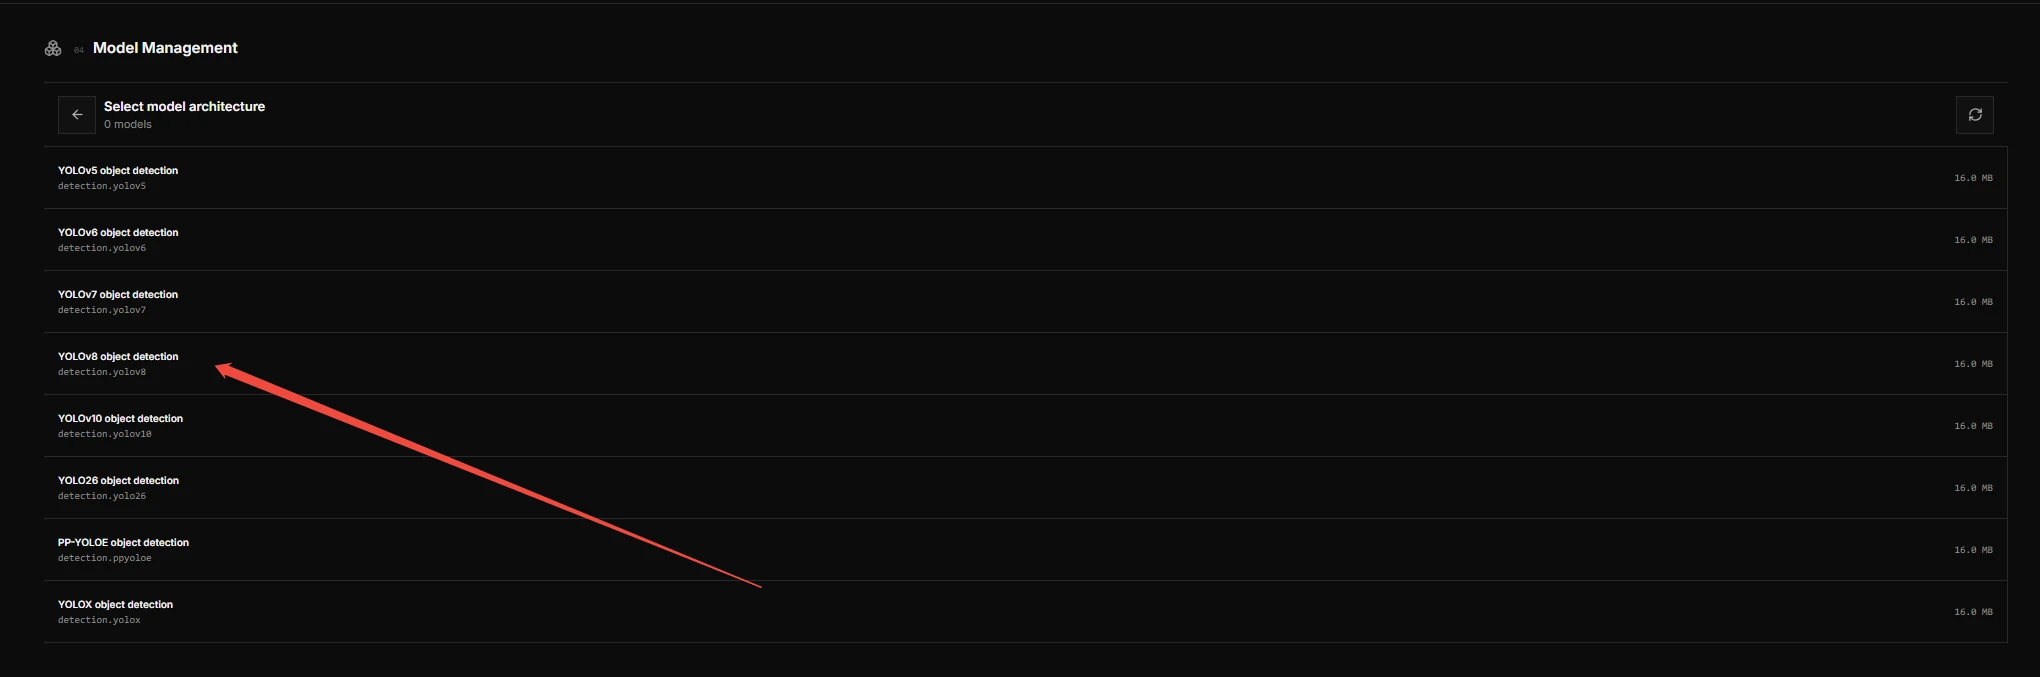
- Choose Object Detection, then YOLOv8.
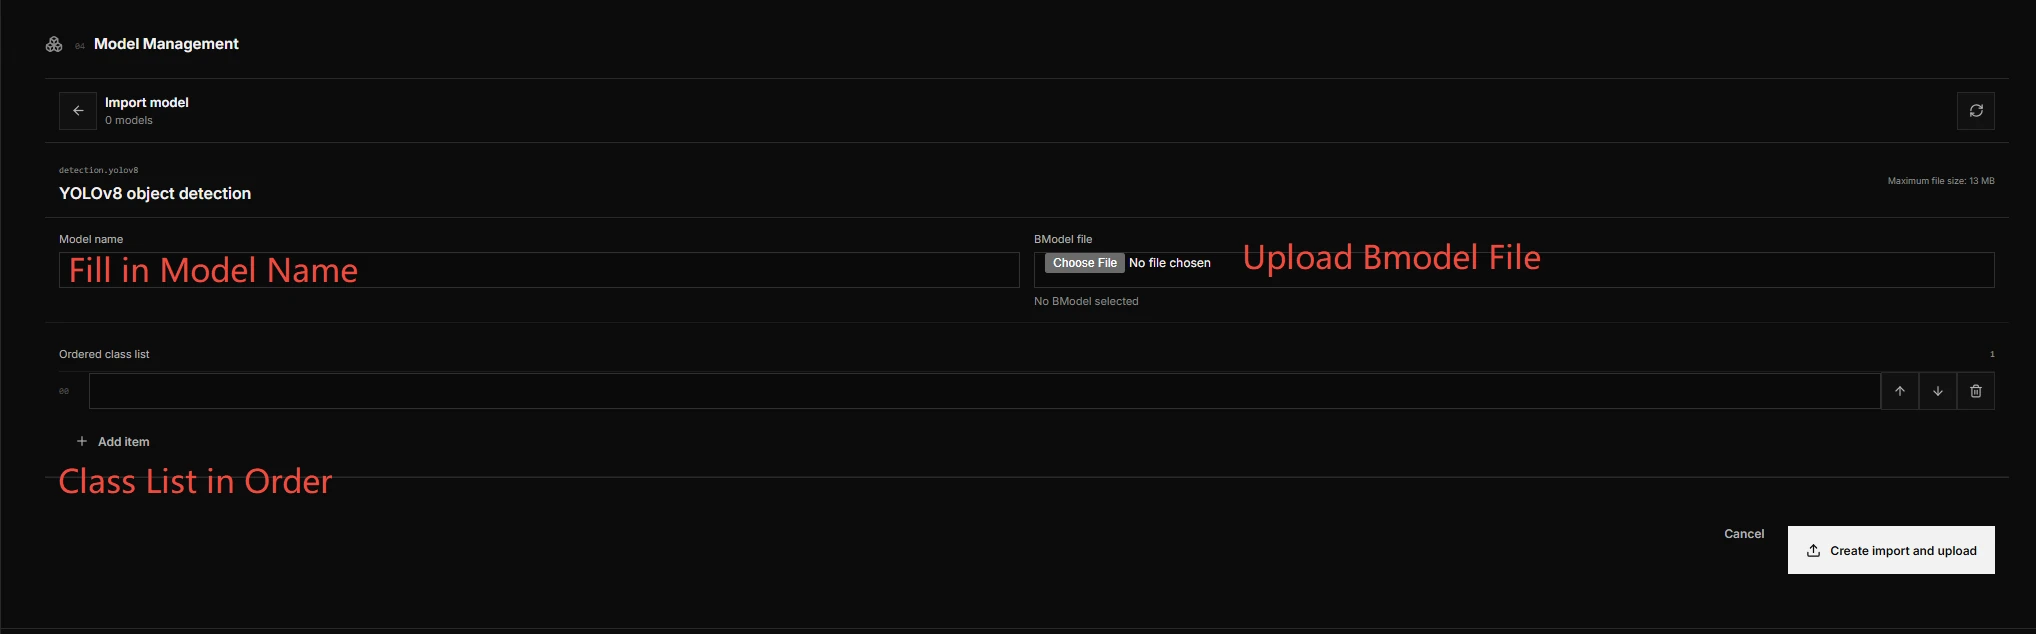
- Enter a recognizable model name, such as
helmet-detection-v1. - Select
yolov8n_cv184x_int8.bmodel. - Add the class names in exact training-index order.
- Start the upload and wait for device-side validation.
YOLOv8 does not use the Anchor editor in OVIS Web. The page reads the importer, file-size limit, metadata schema, and class-count constraints from the connected device. If YOLOv8 is absent from the importer list, update the device firmware before continuing.
Do not close the page during upload. A failed upload can be retried, but the complete file is sent again from byte zero.
Configure and activate the model
After validation succeeds:
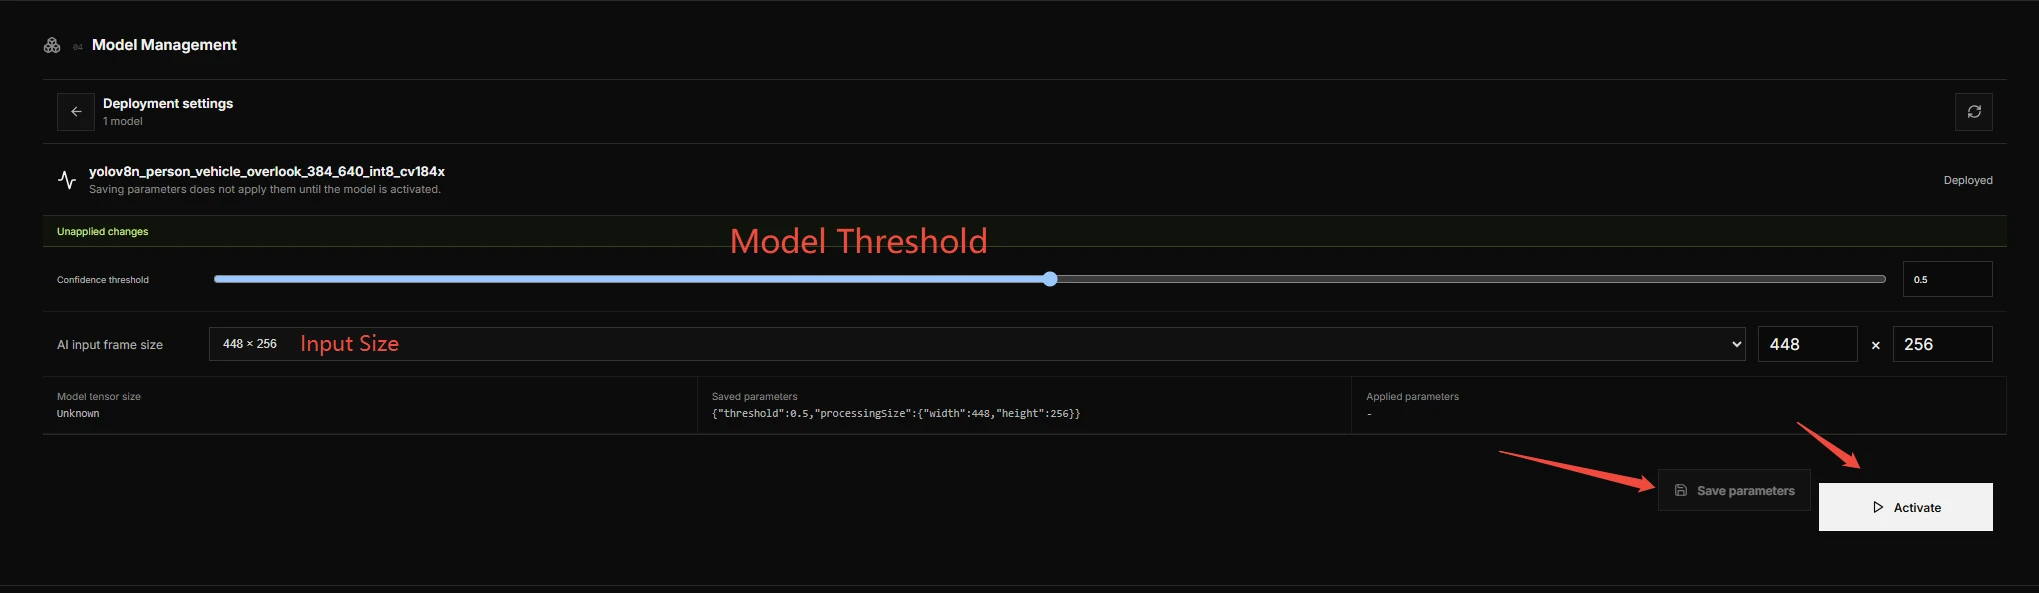
- Open Deployment Configuration.
- Set the confidence threshold.
- Select or enter an allowed AI input frame size.
- Save the deployment parameters.
- Select Activate.
The BModel tensor size is read-only. AI input frame size controls the frame sent to the AI pipeline and may differ from the fixed 640 x 640 tensor size. OVIS Web validates it against the ranges and presets reported by the device.
Activation creates an apply task and may briefly restart the AI pipeline or interrupt the management connection. Keep the page open while OVIS Web reconnects to the same device ID and verifies the task. A transient network error at this point does not mean the deployment failed.
After activation, the model is marked Running. The object-detection section also shows the custom model as the current running model.
Update or Remove the Model
- Change the threshold or AI input frame size from Deployment Configuration. For a running model, use Save and Apply and wait for the task to finish.
- Deactivate a running model before deleting it.
- Import an updated BModel as a new model entry. The artifact cannot be replaced in place.
Troubleshooting
YOLOv8 is missing from Add Model
The firmware did not report a compatible detection.yolov8 importer. Update Ovis Manager and the device firmware, then reconnect.
Import validation fails
Open the import task and read the device's validation error. Check that:
- The file is a complete BModel compiled for CV184x.
- The ONNX model came from the Ovis
yolov8_export.pyscript. - The entered class count matches the model output.
- Class names are unique and follow training-index order.
- The file is within the limits displayed by OVIS Web.
Activation fails
OVIS Web displays the task error and rollback result returned by the device. Correct the deployment parameters or BModel before trying again. If the page loses the device temporarily, allow the 90-second reconnect check to finish.
INT8 accuracy is lower than expected
Check whether the calibration images cover the production camera, lighting, target sizes, and operating scenes. Compare PyTorch, ONNX, MLIR, and BModel outputs with the same images to identify the stage where accuracy changes.