Manage OVIS with OVIS Web
OVIS Web discovers, initializes, and configures OVIS devices connected to your computer. It talks directly to the Manager API on the device, so no desktop client or separate sign-in is required.
OVIS Web is open source. The source code is available in the OVIS Web GitHub repository.
Before you start
Prepare the following:
- The latest version of Google Chrome or Microsoft Edge.
- An OVIS device connected with a data-capable USB cable and powered on.
- Permission to access the local network when the browser asks.
- WebUSB support when initializing a new device. Safari and Firefox cannot complete the initialization flow.
Open OVIS Web as a top-level HTTPS page. Local-device access may be blocked when the page is embedded in another site.
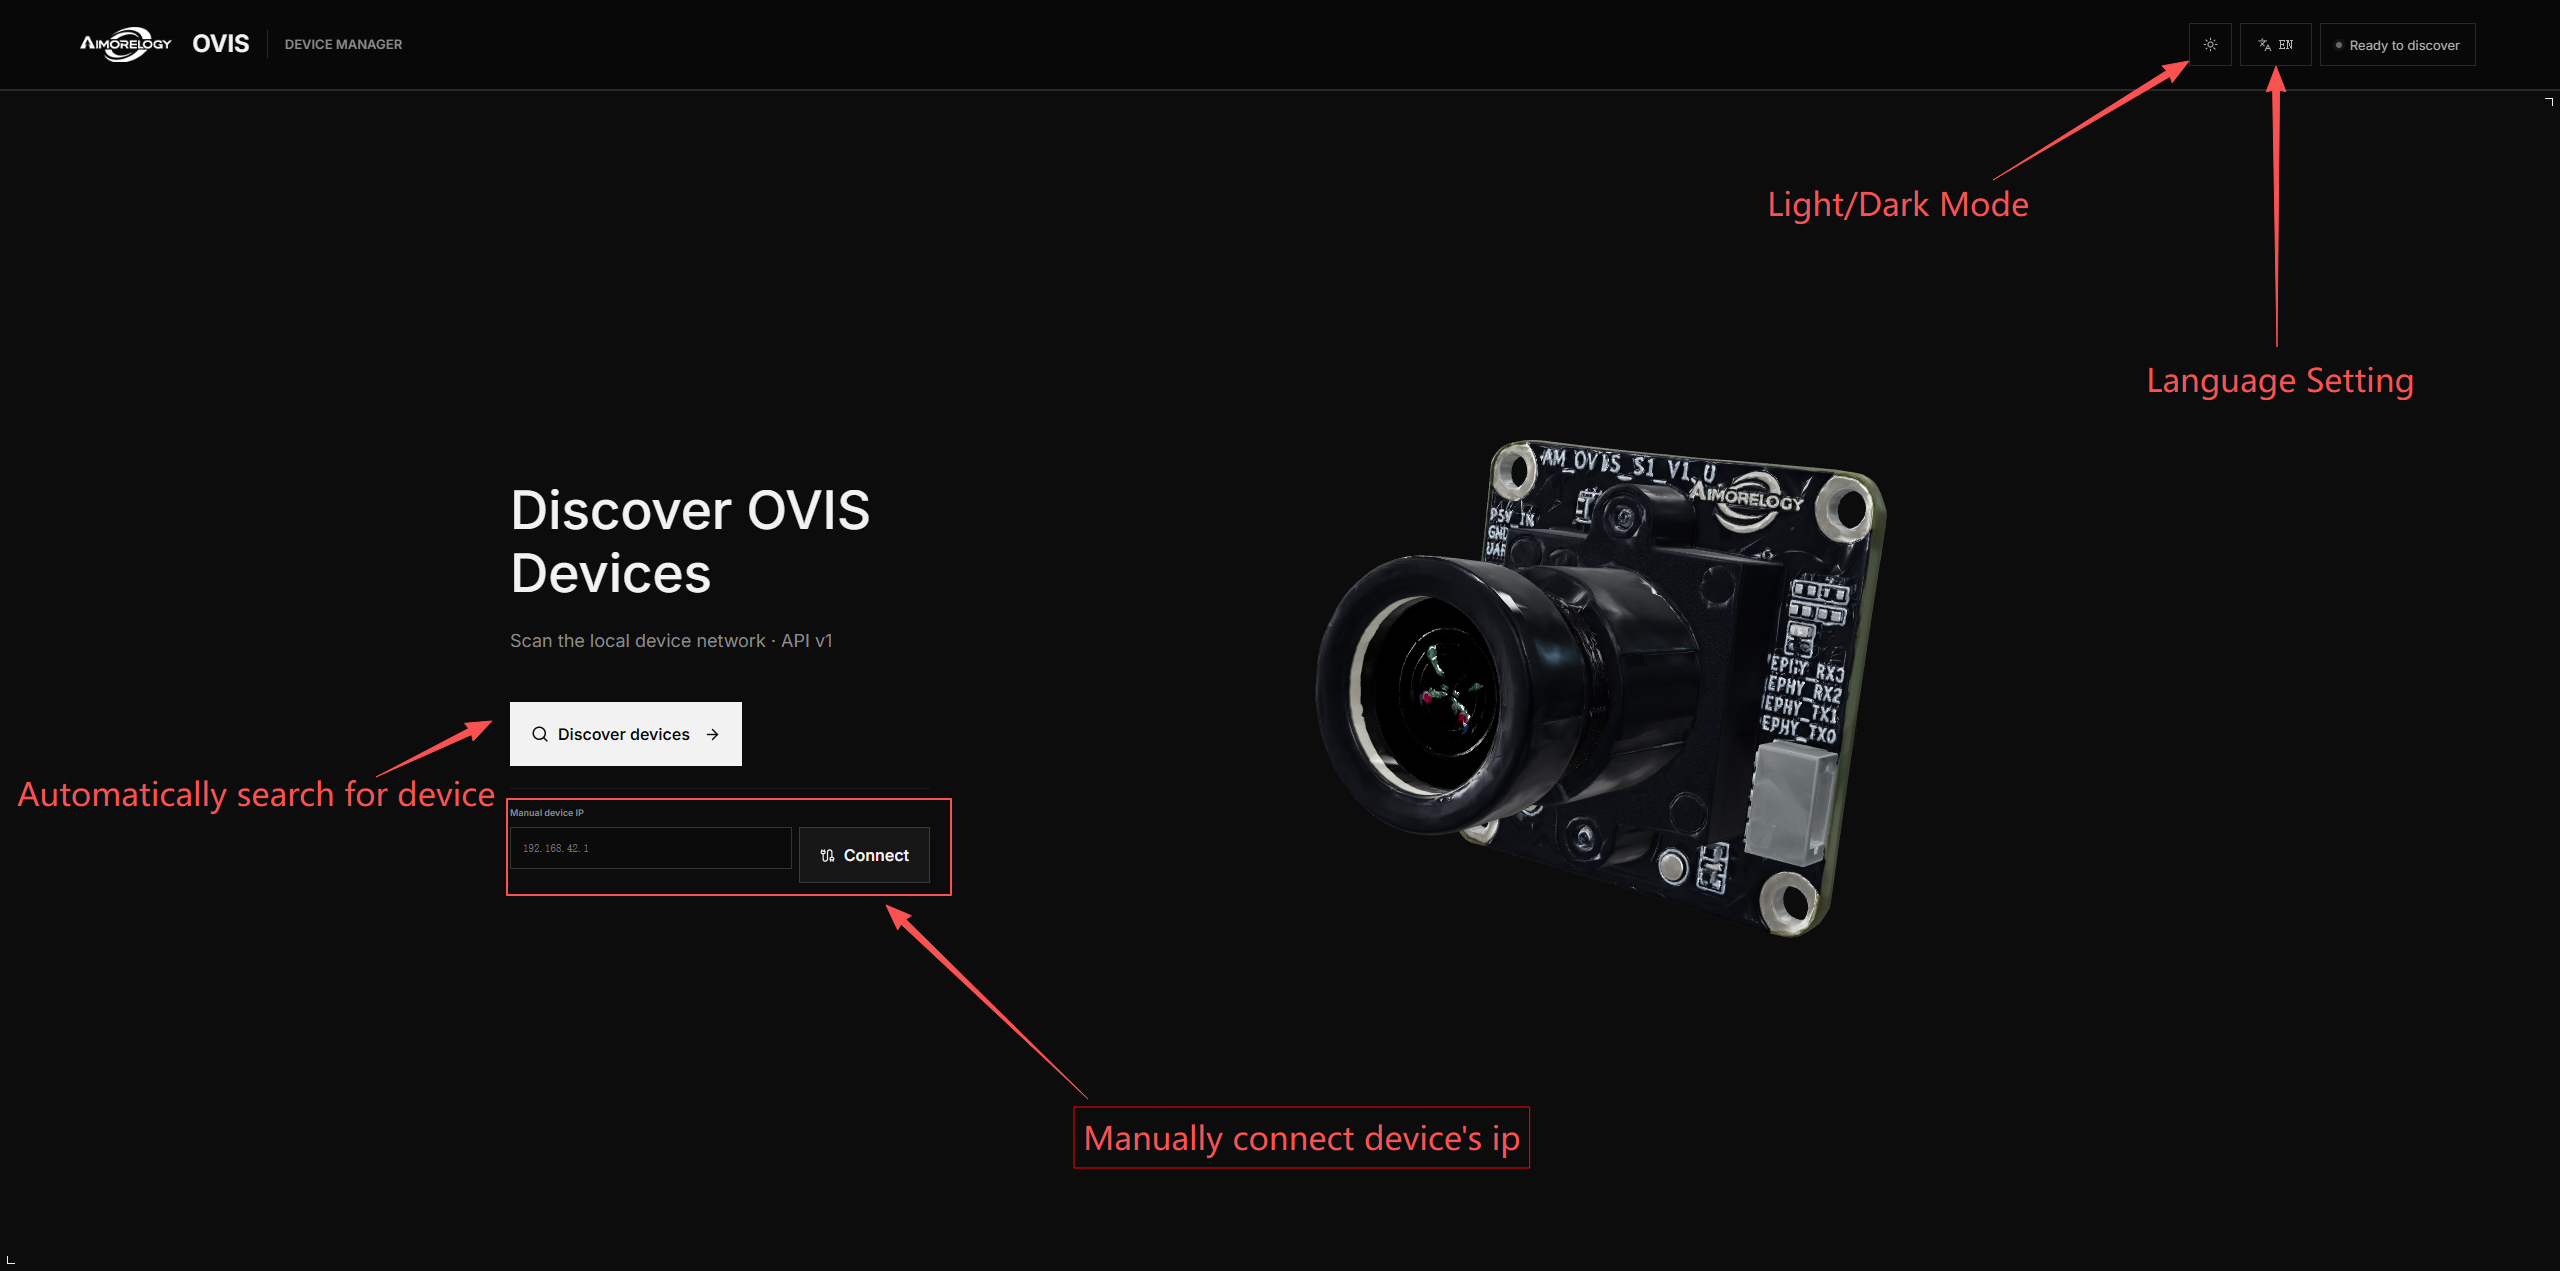
The controls in the upper-right corner switch between light and dark themes and change the display language. These choices do not change the device configuration.
Find an OVIS device
Select Search devices. One search checks both device states:
- Initialized devices are discovered through their local
192.168.X.1Manager address. - Uninitialized devices are discovered through WebUSB.
Allow local network access
Chrome displays a local network access prompt the first time the site contacts an OVIS device. Select Allow. If access was denied earlier, open the site settings for ovis.aimorelogy.com, set Local network access to Allow, and run the search again.
Handle the USB device picker
When no uninitialized OVIS has been authorized before, Chrome may open its USB device picker during the same search.
- Select the matching OVIS when you need to initialize it.
- Cancel the picker when you only need an initialized network device.
Canceling USB authorization does not stop network discovery. Network devices can appear while the picker is still open, and the remaining address scan continues in the background.

Read the search results
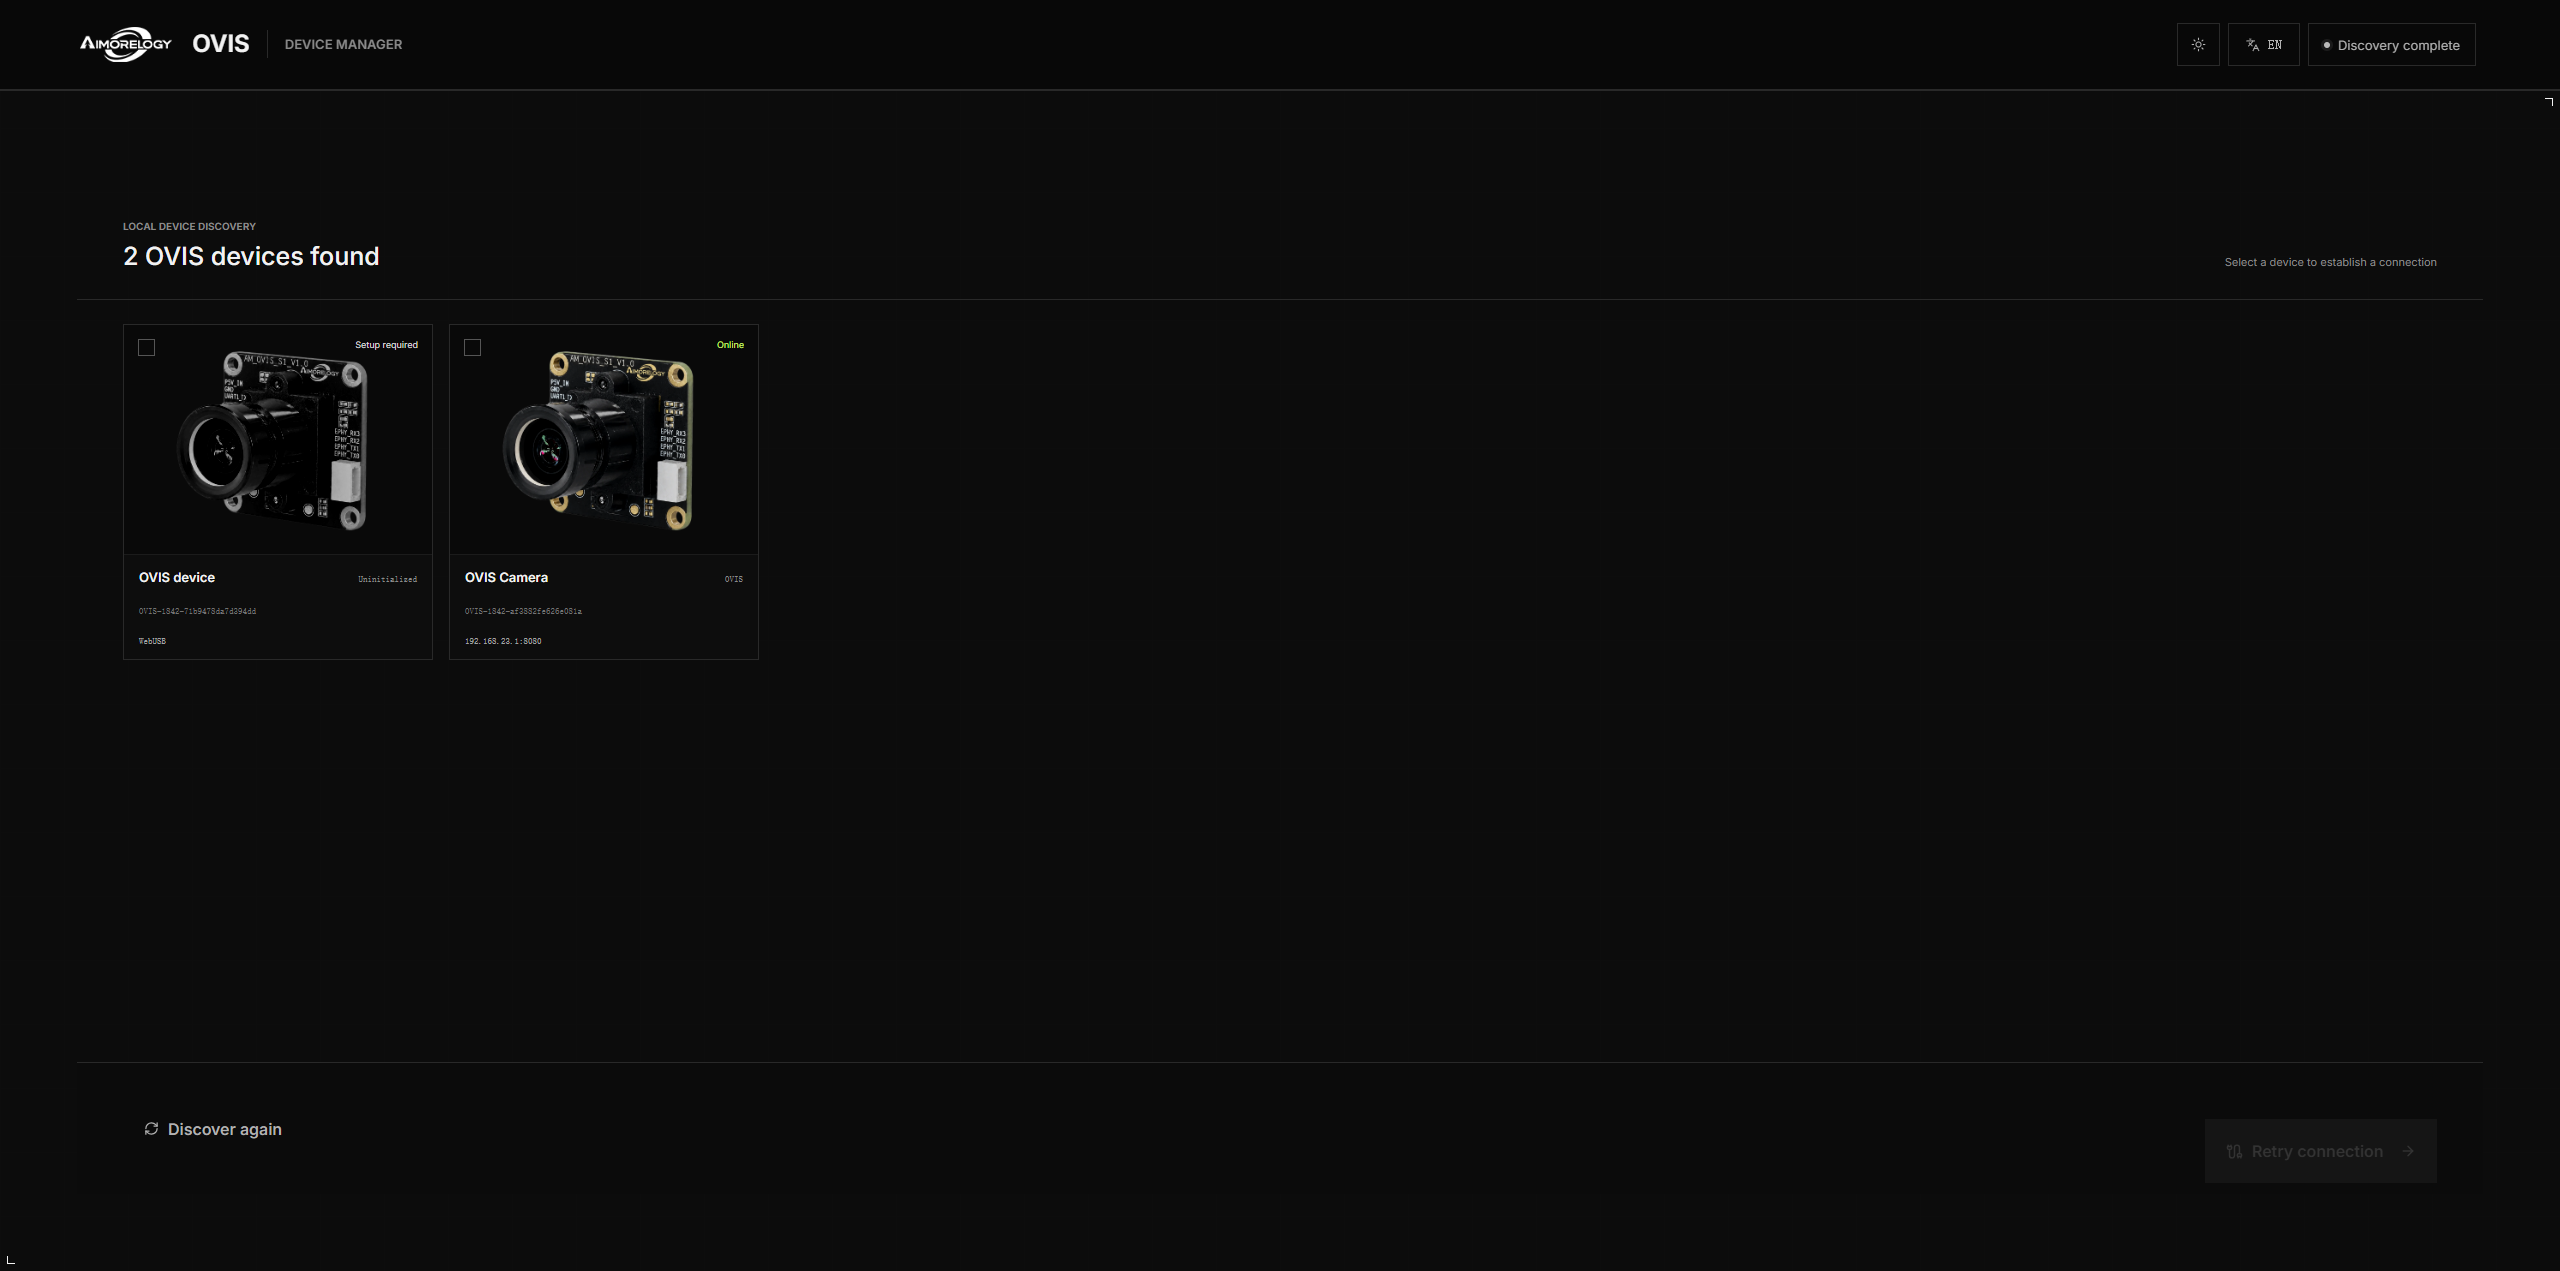
OVIS Web displays a device as soon as it responds; it does not wait for every subnet probe to finish. Each result carries one of these states:
- Online — the management subnet is configured and the device can be connected.
- Needs setup — the device has no management subnet yet.
- Offline — the address responded earlier but is temporarily unavailable.
Select a device card, then choose Connect or Initialize device. You can stop the background search after the required device appears.
Connect an initialized device
Select an online device and choose Connect. OVIS Web reads /device/info again and checks the device ID and API version before opening the configuration page. This check prevents a different device at the same address from being accepted by mistake.
If the connection attempt fails after the device was found, choose Retry connection. The retry only contacts the selected address and does not repeat the full subnet scan.
You can also enter a known address in Device IP address, for example 192.168.42.1. OVIS Web adds the Manager port and API path, verifies the response, and opens the configuration page only when the address belongs to a compatible OVIS.
Initialize a new device
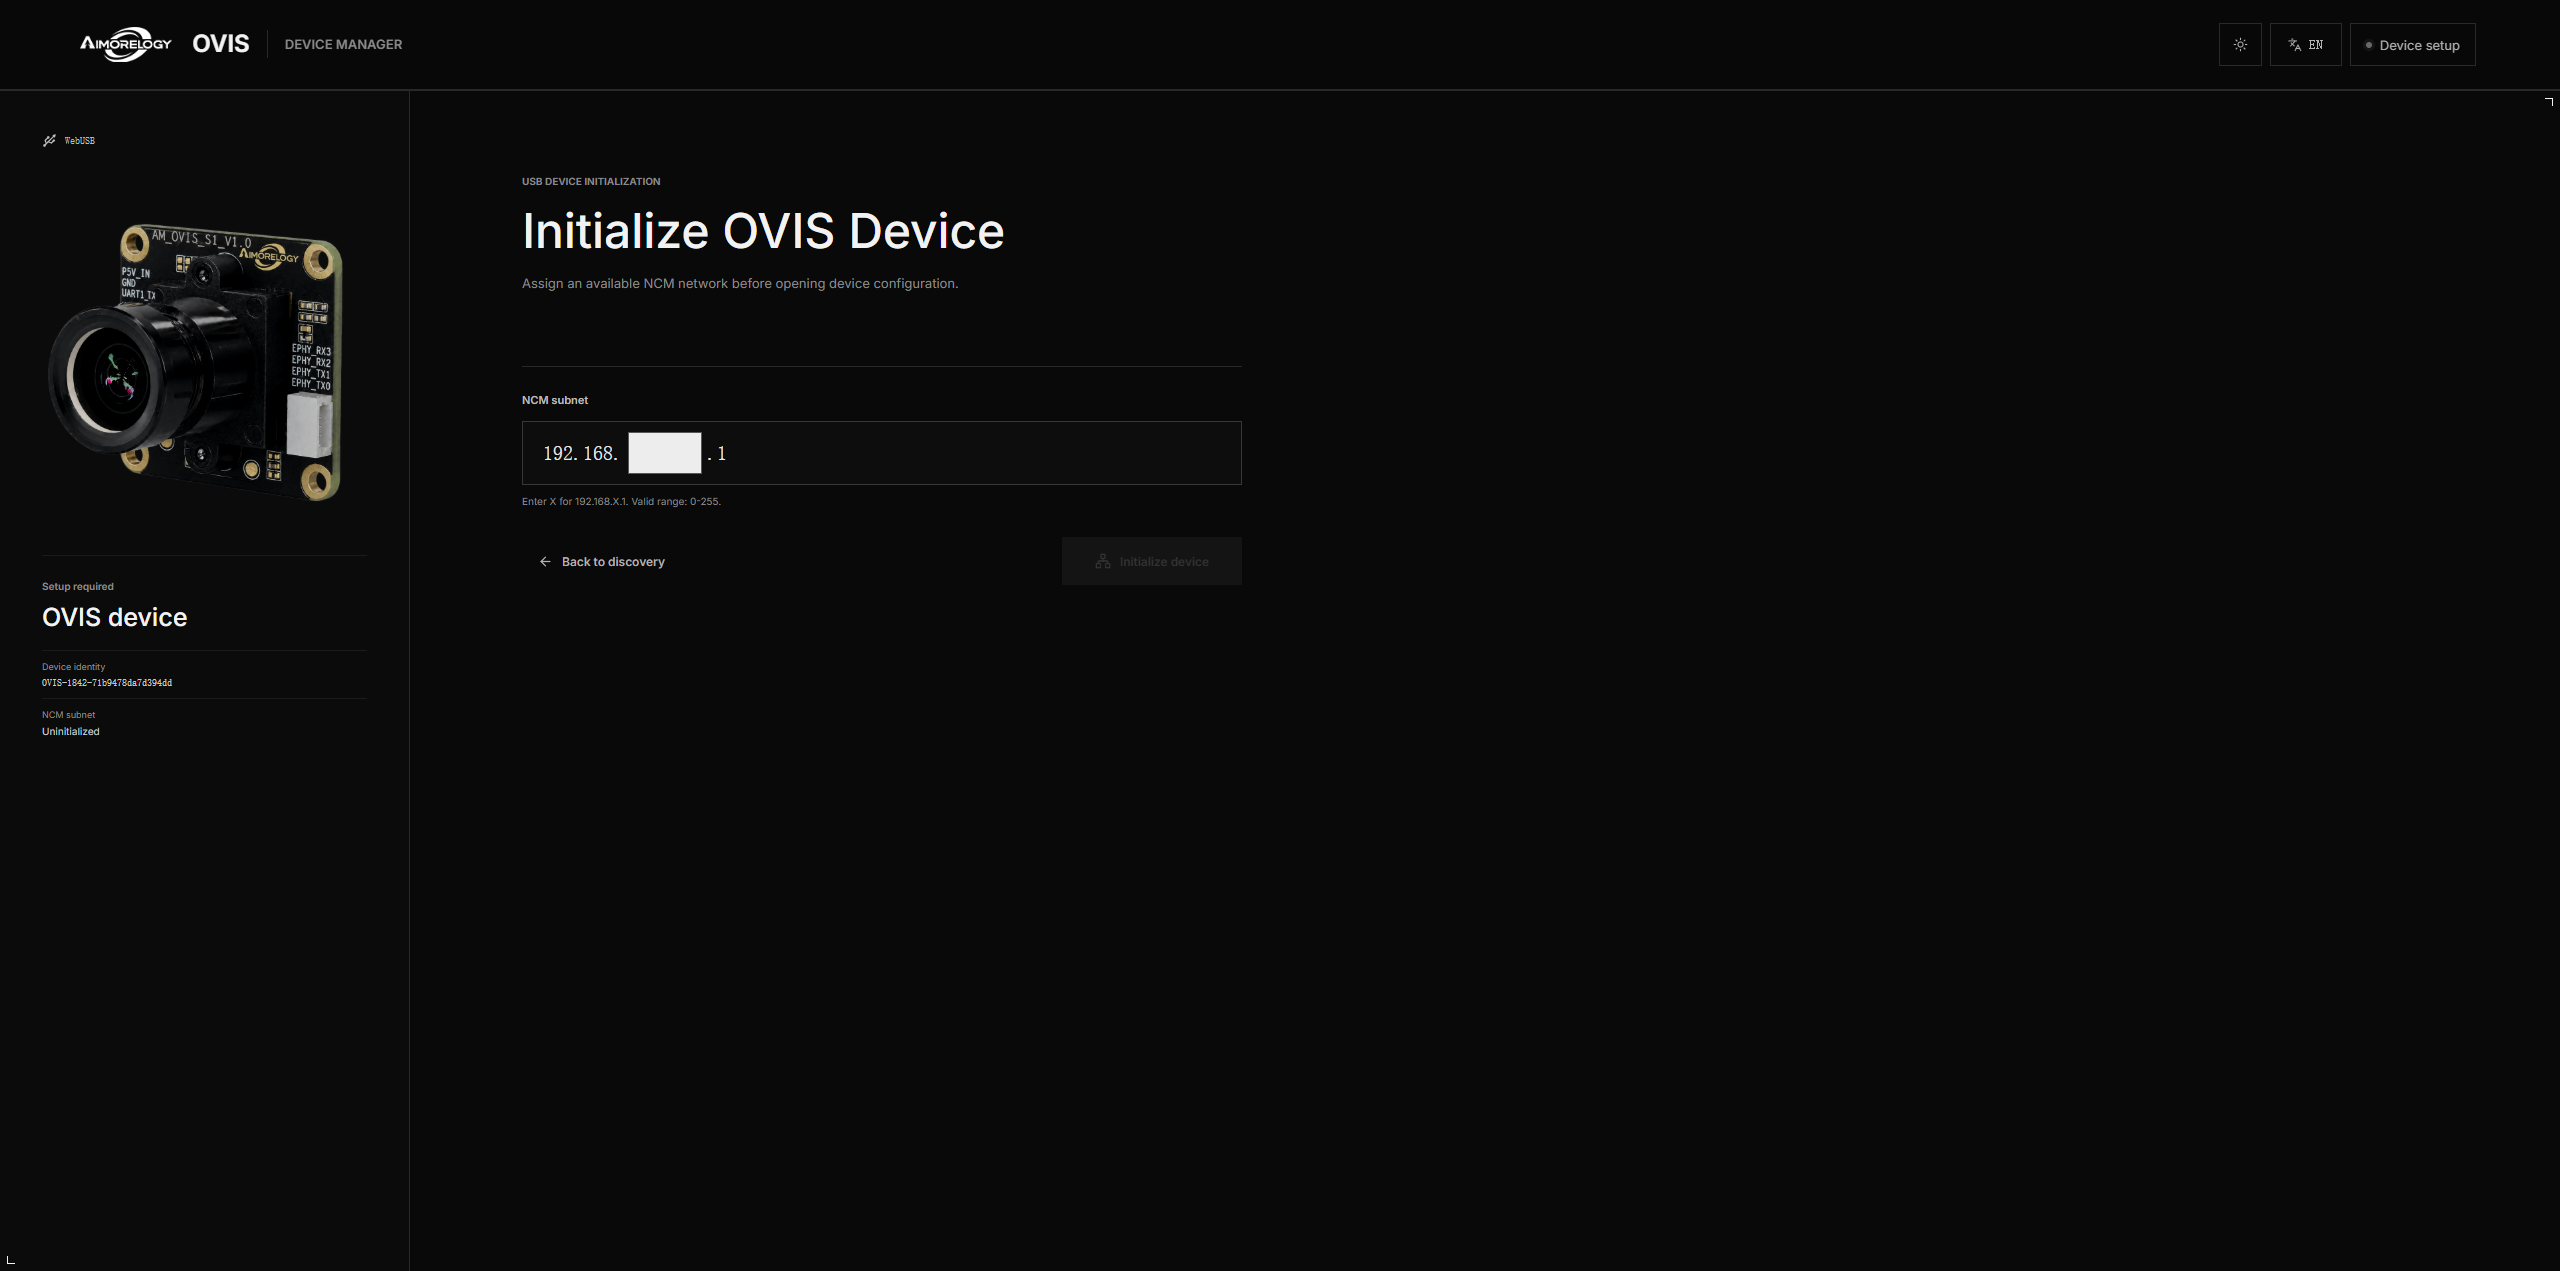
Select a device marked Needs setup, then choose Initialize device.
- Enter the
Xvalue for192.168.X.1. The accepted range is0through255. - Confirm that the resulting address is the subnet you want to assign. Entering
42, for example, assigns192.168.42.1to the device. - Select Initialize device and keep the device connected.
Before committing the address, OVIS Web checks devices already found in the current search and probes the target IP. An address already used by another verified OVIS is rejected.
The device saves the subnet and restarts. A brief USB disconnect after the commit is expected. OVIS Web probes the new address every 2 seconds for up to 90 seconds and continues only when the responding device ID matches the USB device that was initialized.
Use the configuration workspace
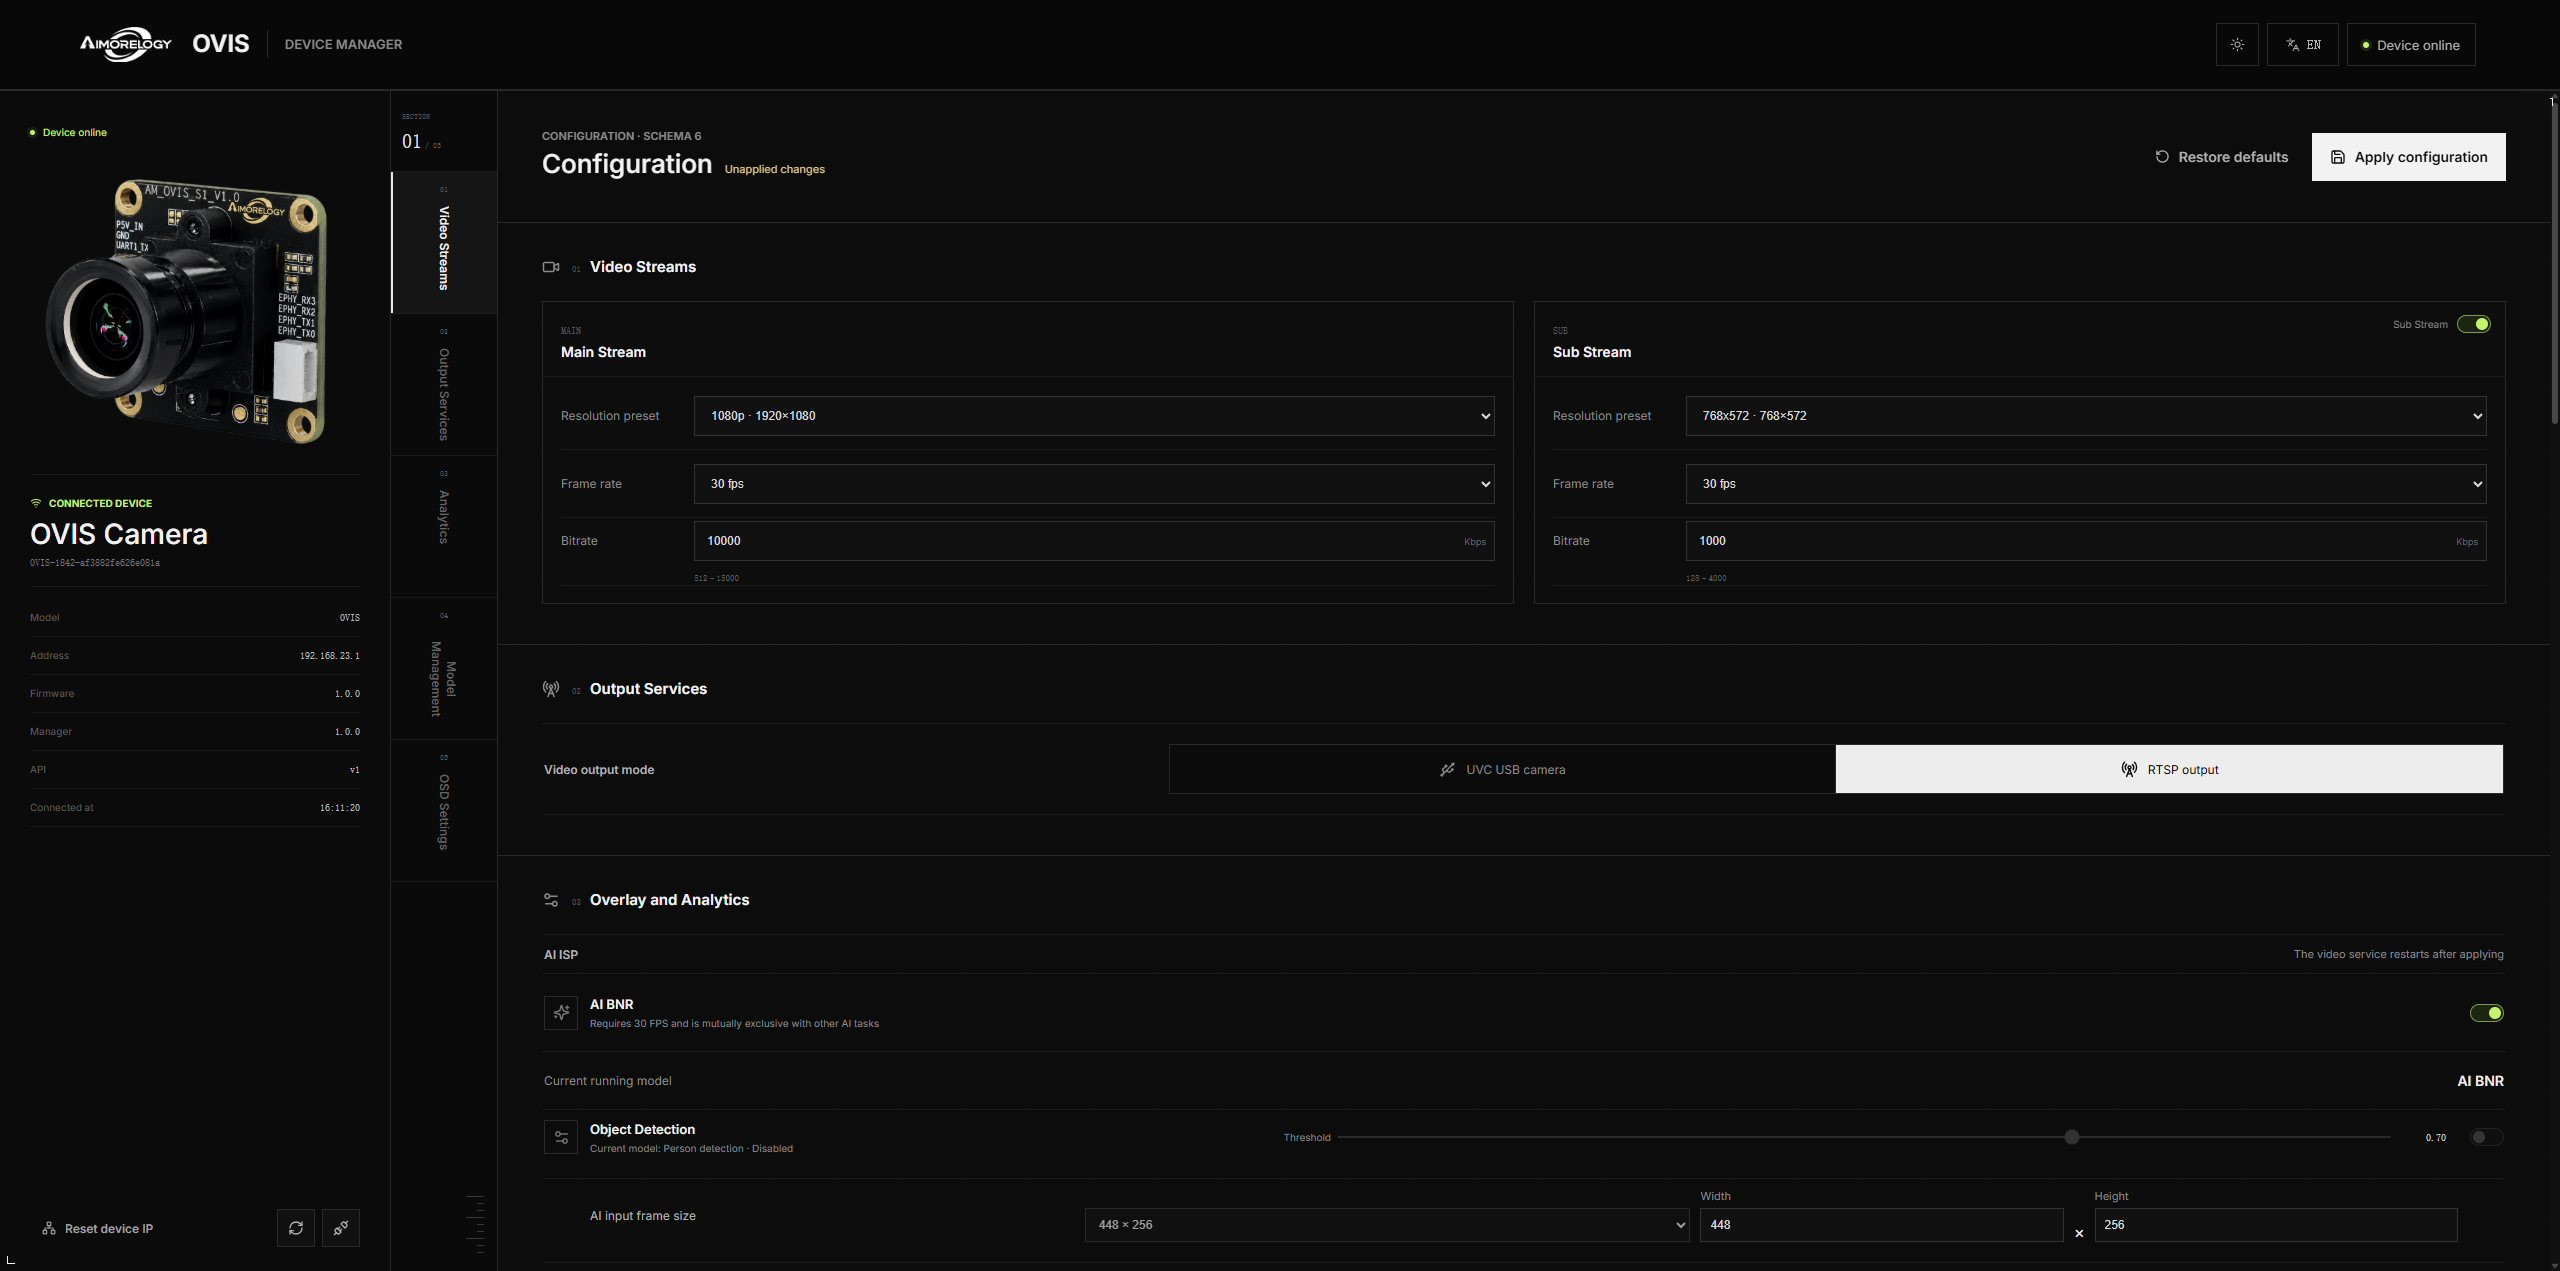
The configuration workspace has three columns:
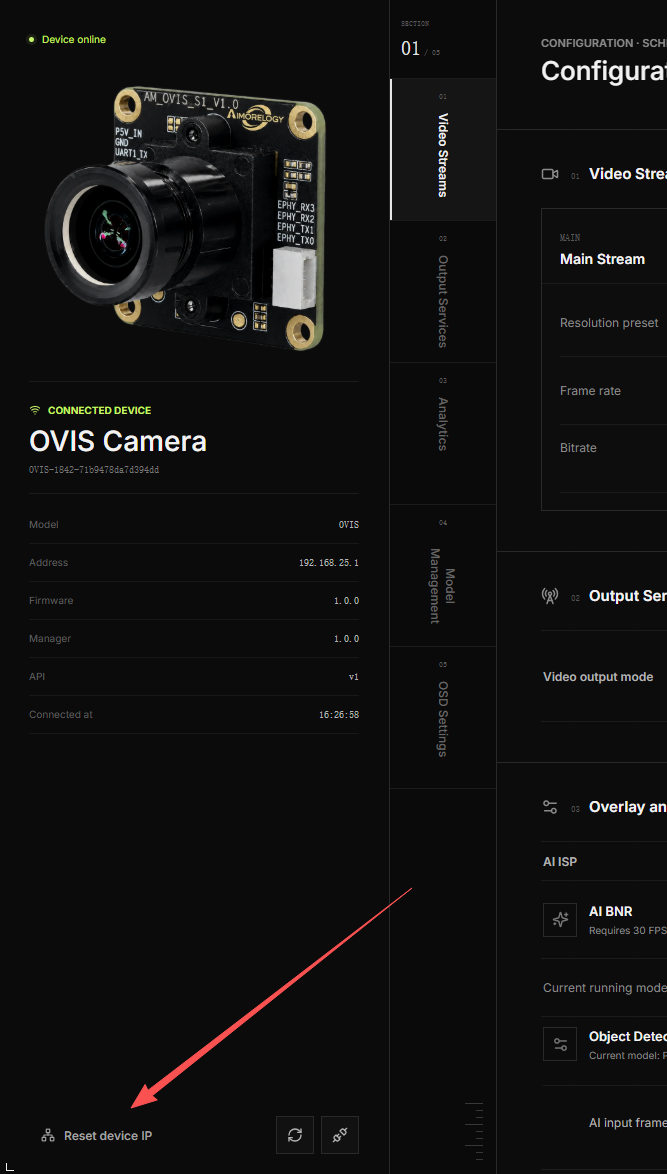
- The fixed device dashboard on the left shows the product image, device ID, management subnet, firmware, Manager version, API version, and connection time.
- The narrow section menu in the middle jumps to a configuration category.
- The panel on the right contains the controls and is the only vertically scrollable area on desktop.
The firmware capability response controls which sections and options are visible. A section may be absent on an older firmware build or on a device that does not advertise the feature.
Video streams
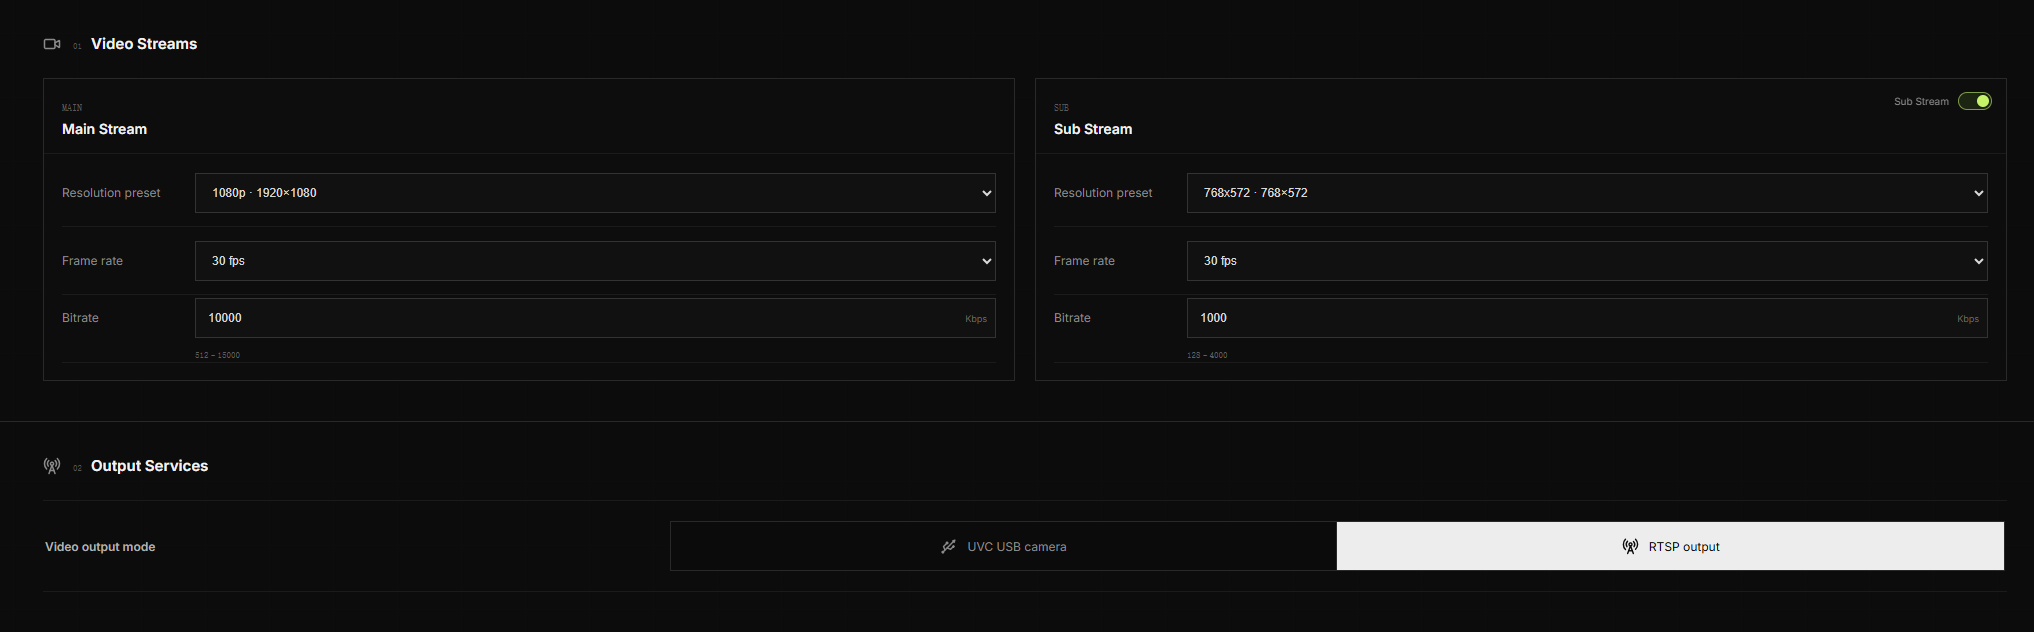
The main stream exposes the resolution profile, frame rate, and bitrate supported by the device. Firmware that supports 60 FPS includes it in the main-stream list. The sub-stream uses its own capability list and can be enabled separately.
When RTSP output is disabled, bitrate and sub-stream controls are disabled but retain their saved values. Main-stream frame rate remains editable because it also affects camera capture.
Output service
Choose one video output mode:
- UVC exposes OVIS as a USB camera.
- RTSP exposes the configured network stream.
One mode is always selected. Switching UVC can briefly reconnect USB and the management network, so OVIS Web asks for confirmation before applying the change.
AI and tracking
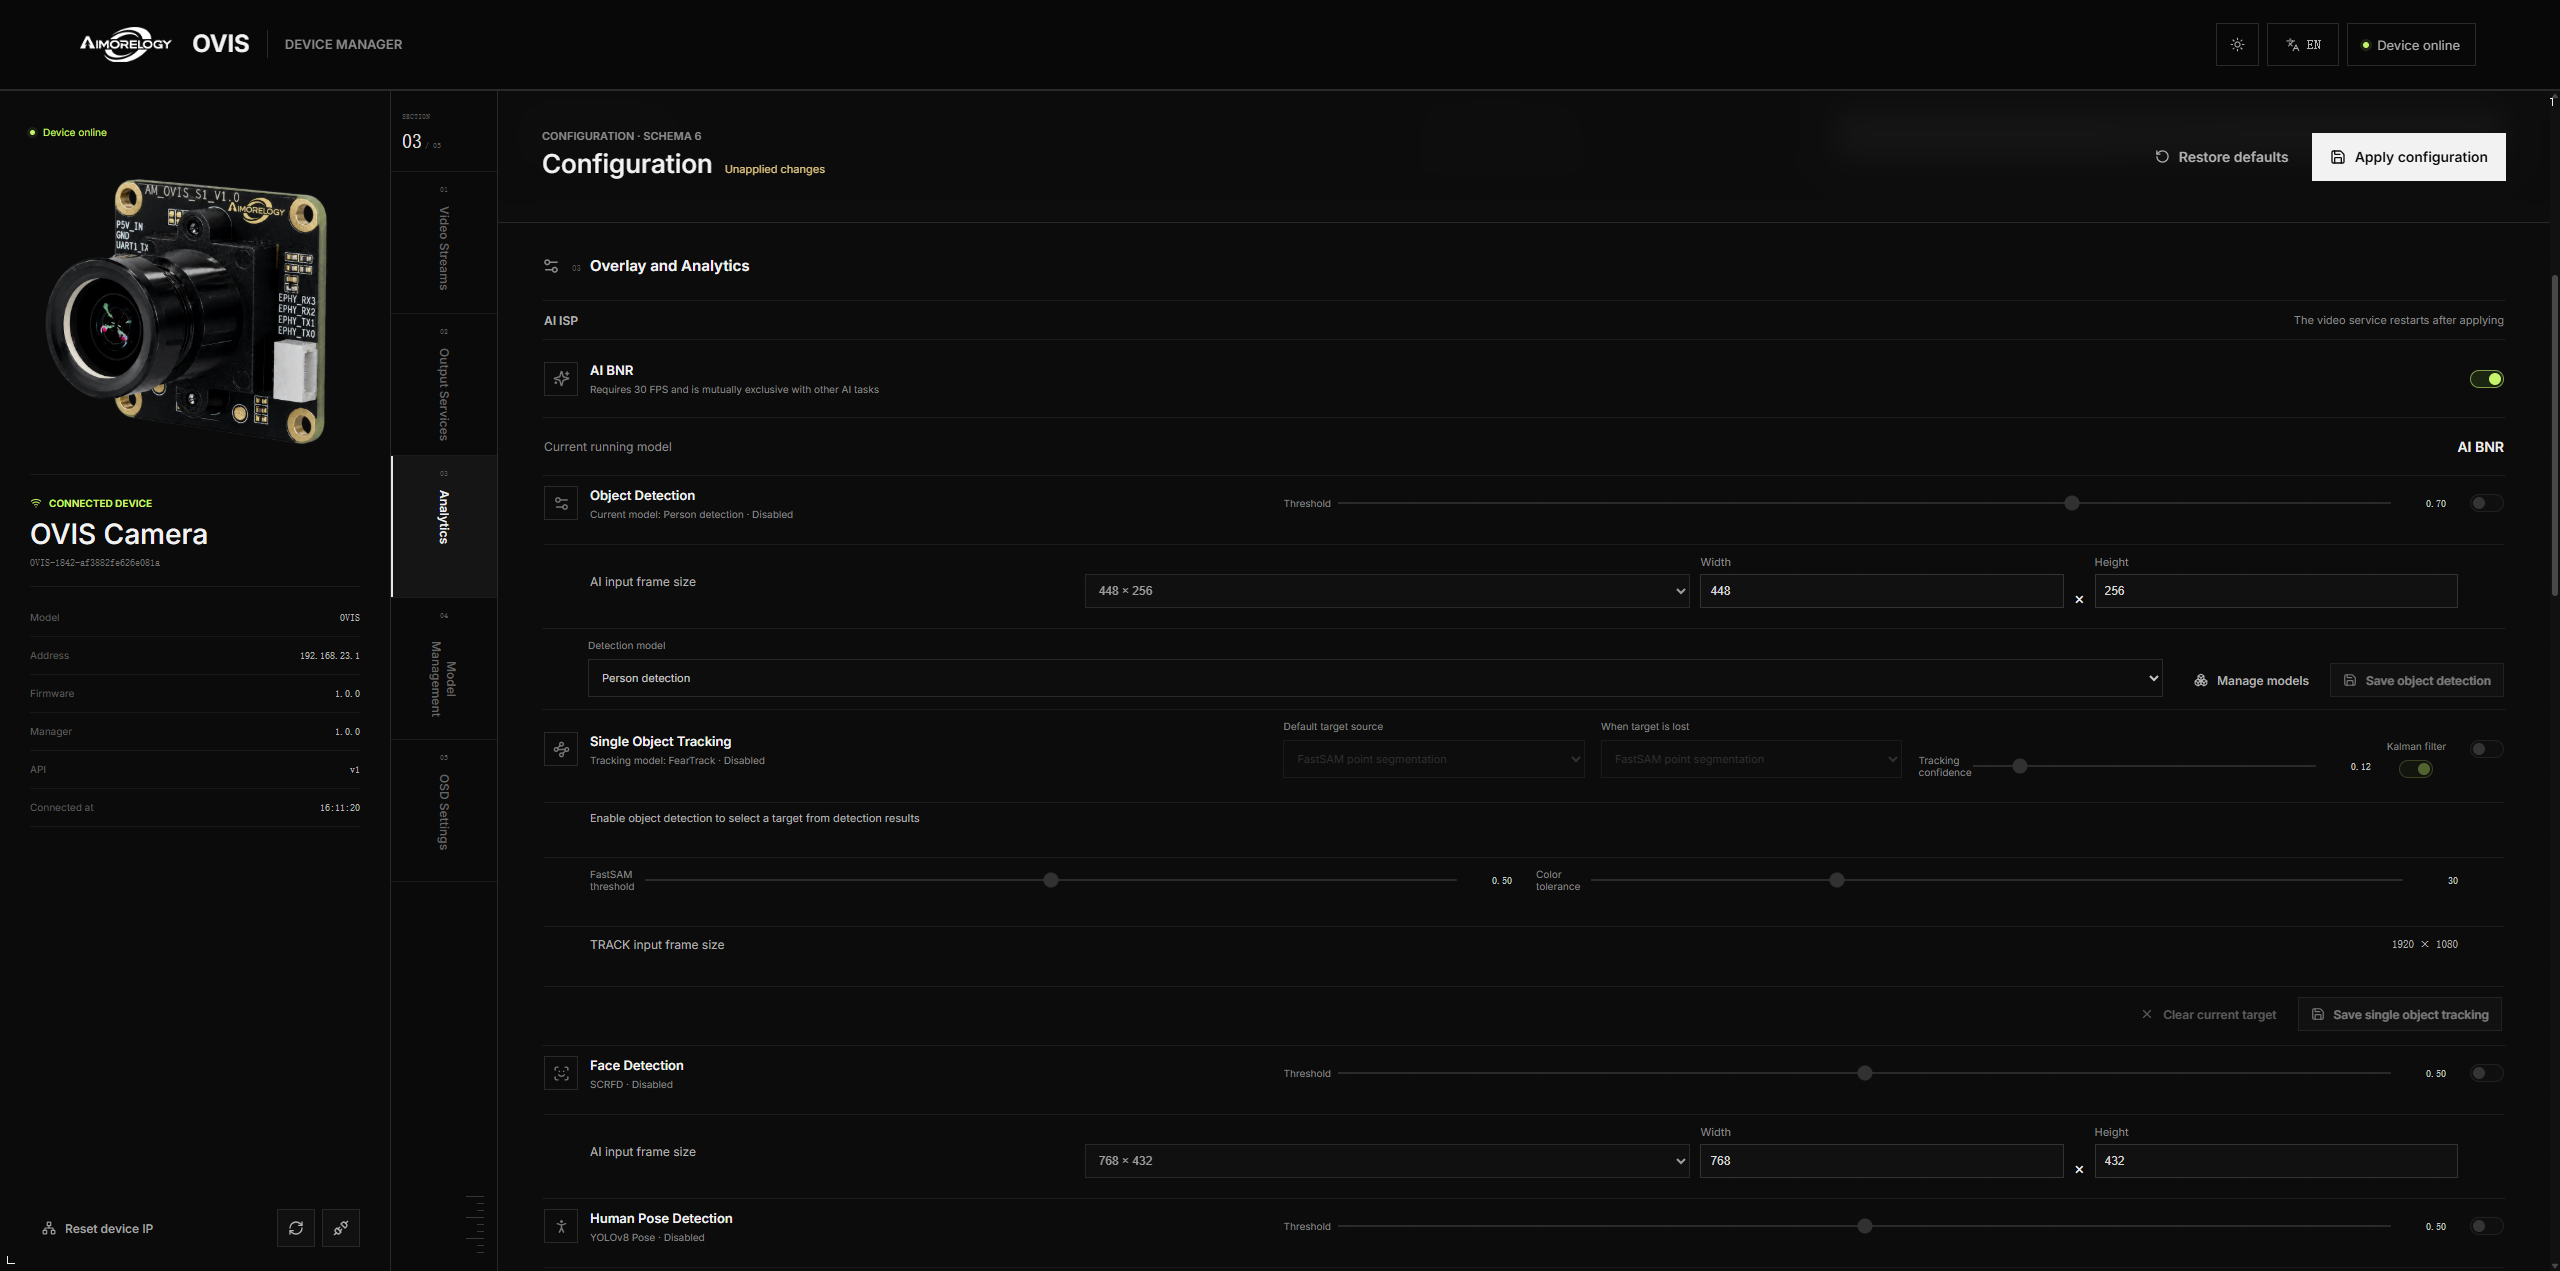
The AI section can include object detection, single-object tracking, face detection, human pose, motion detection, and AI ISP controls.
Object detection can use a built-in person model, a built-in person-and-vehicle model, or a deployed custom detection model. Detection threshold and AI input frame size are configured independently. Available sizes and limits come from the firmware capability response.
Single-object tracking has its own switch and settings. You can configure the default target source, fallback source, score threshold, Kalman filter, FastSAM threshold, color tolerance, and TRACK input frame size. Enabling tracking does not enable detection, and changing either feature leaves the other configuration intact.
Several TPU features may share the same compute resources. OVIS Web asks for confirmation or shows the validation error returned by the device when a combination is not available.
Custom models
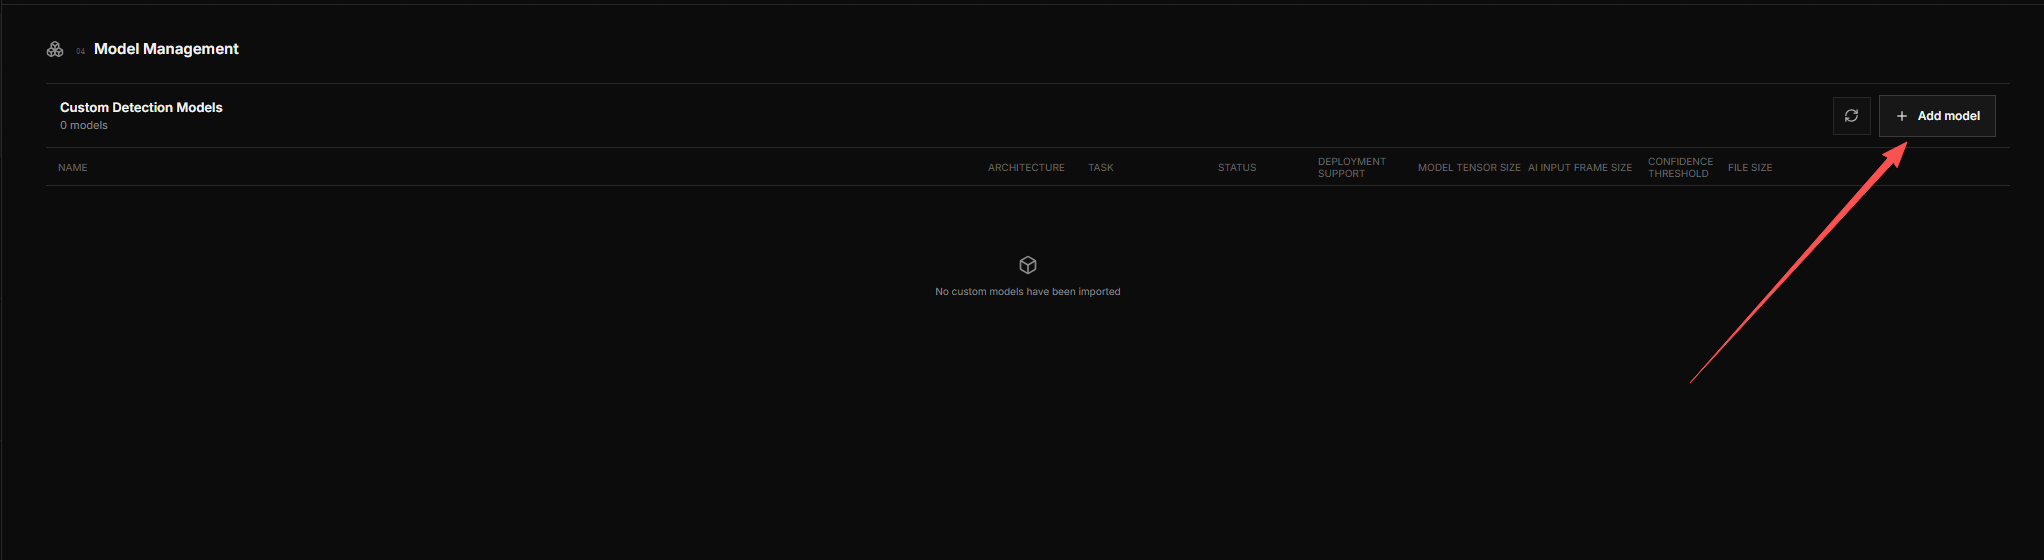
The model manager lists the importers reported by the device and supported by the current OVIS Web version. Depending on firmware, the list can include object detection, image classification, keypoint detection, instance segmentation, image feature extraction, and sound command classification.
To import a model:
- Select Add model, then choose a task and architecture.
- Enter the metadata requested for that importer and select the BModel file.
- Upload the file and wait for device-side validation.
- Open Deployment configuration and save the runtime parameters.
- Select Activate to create the apply task.
Class order in the editor is the model class ID order. Importers such as YOLOv5 and YOLOv7 also provide an Anchor editor.
Saving deployment parameters does not activate a model. An active model must be deactivated before it can be deleted. OVIS Web also blocks model activation and deactivation while the main configuration page has an unsaved draft.
Import IDs and active model task state are stored in the browser so an interrupted page can recover the task. The model file itself is not stored in the browser; upload retries restart from byte zero.
OSD settings
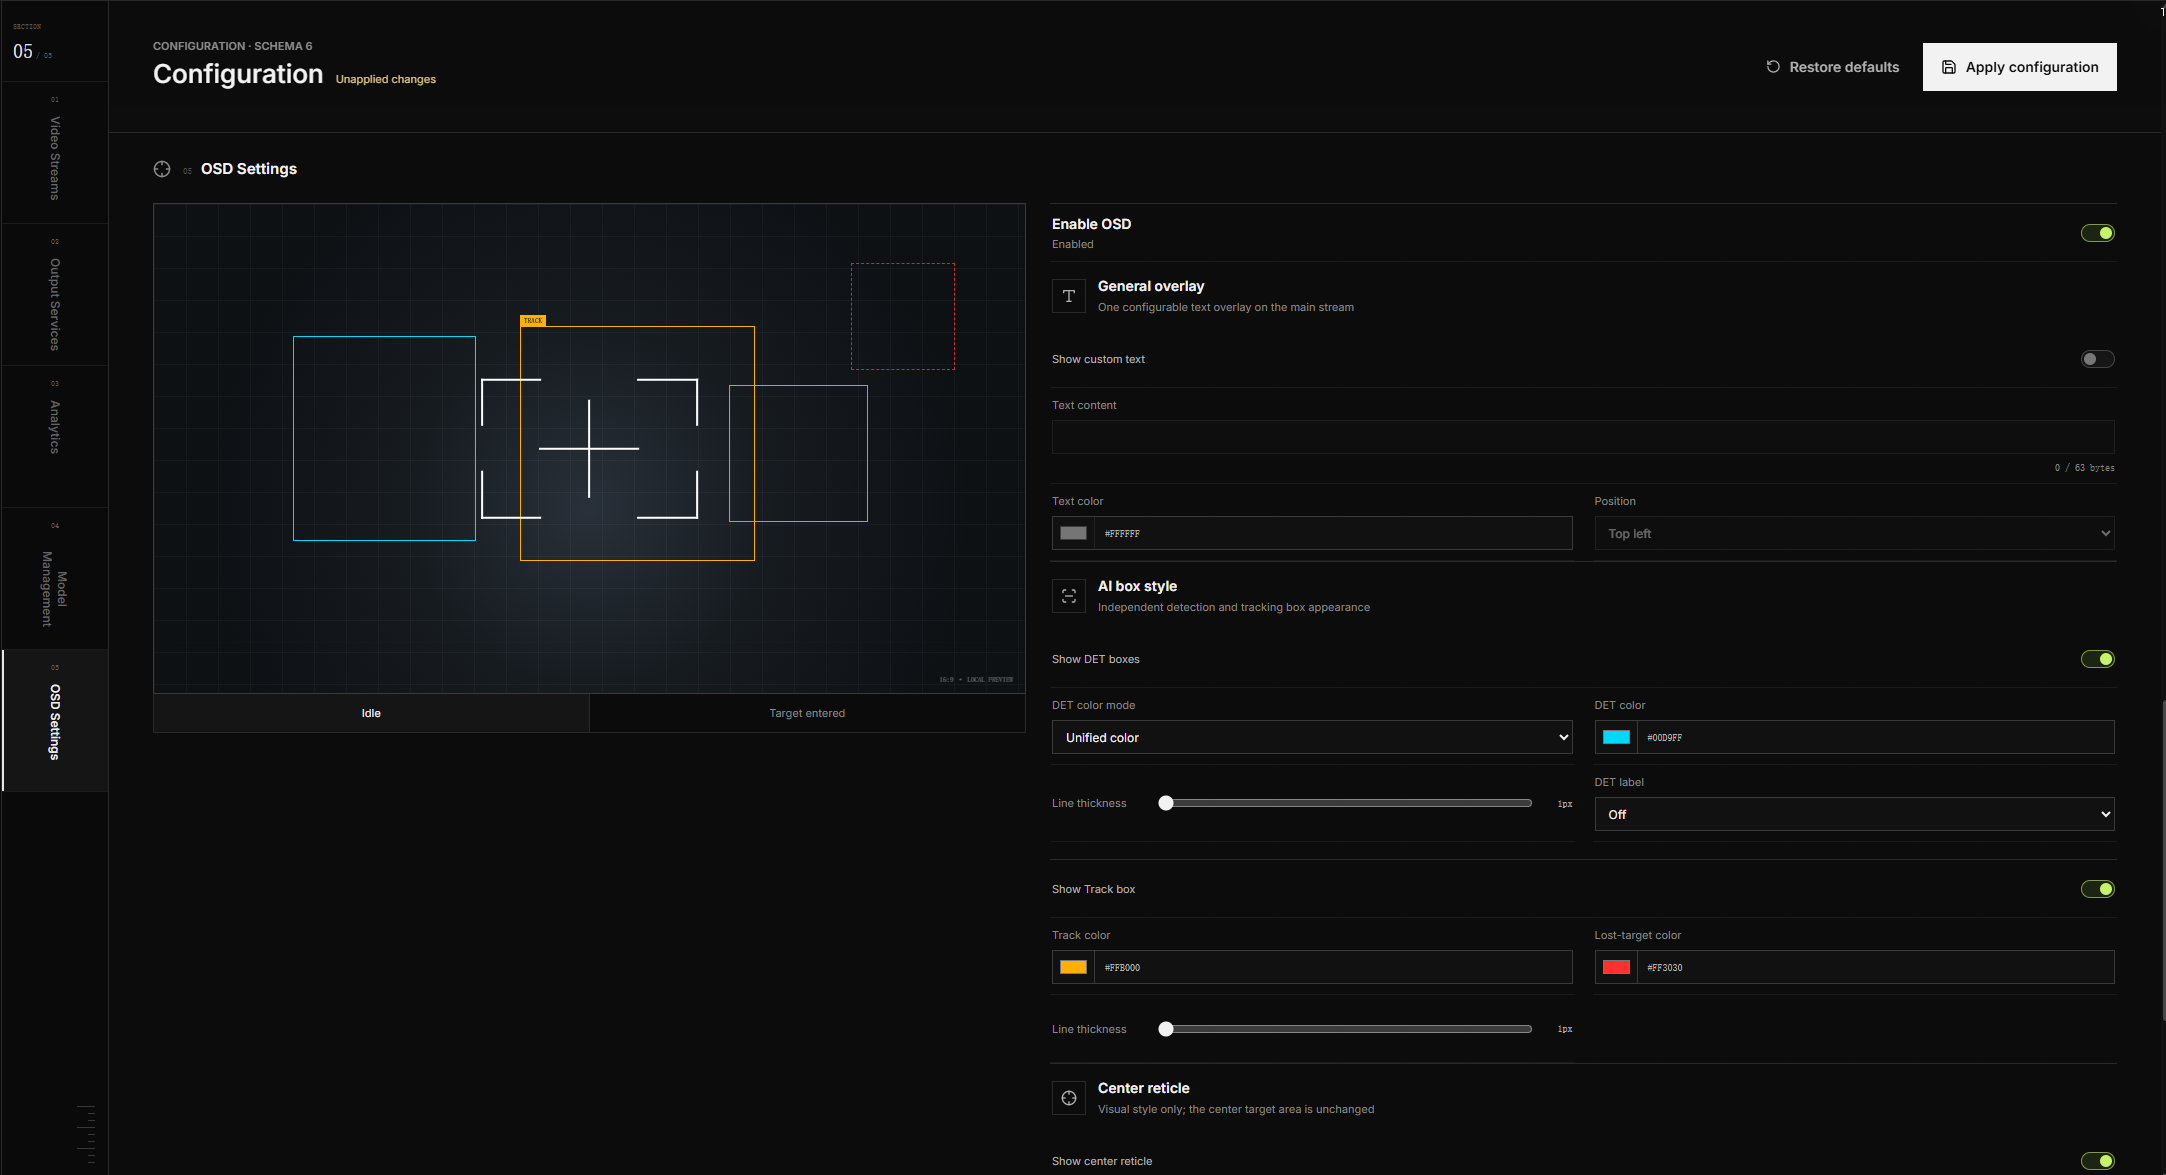
Firmware with the full overlay capability displays OSD settings at the end of the configuration page. The section contains three groups:
- General overlay text, including content, color, and position.
- DET and Track box styles, including visibility, colors, line thickness, and labels.
- Center reticle style, including template, idle color, target-ready color, line thickness, and visibility while tracking.
The 16:9 panel is a local style preview. Color, thickness, and reticle changes update immediately in the browser but are not sent to the device until the configuration is applied. The preview is not a live video feed and does not change the target selection region.
Only templates and ranges reported by the firmware are shown. Older firmware that returns only the OSD master switch cannot display the complete style editor.
Save and apply changes
Changing a control updates a browser-side draft. The device is unchanged until you select Save and apply.
OVIS Web validates, saves, and applies the full configuration in sequence. Warnings and management-reconnect requirements are shown in a confirmation panel before the write continues. Configuration controls stay locked while the task is running.
The status moves through validation, saving, applying, reconnecting, and verification. A video-service or USB-network restart can temporarily interrupt requests. OVIS Web waits up to 90 seconds for the same device ID, then verifies the task and configuration revision after reconnecting.
When the task succeeds, the page reloads the device configuration. When the task fails and the device reports a rollback, the page displays the rollback result and restores the values currently held by the device. A revision conflict also reloads the latest device configuration.
An OSD-only update can be applied without restarting the video pipeline when firmware returns overlay_reload.

Restore defaults, disconnect, or reset the IP
Restore defaults replaces the current draft and the saved device configuration after confirmation.
OVIS Web checks an active device every 3 seconds. Two consecutive failures mark it as disconnected. The disconnect button at the bottom-left only stops browser-side monitoring and clears the current session; it does not stop services or power off the device.
Reset device IP removes the saved NCM subnet and restarts OVIS. The device returns as an uninitialized USB device and must be found again before assigning a new 192.168.X.1 subnet.
Troubleshooting
The local network prompt did not appear
Open the site information control beside the Chrome address bar, select Site settings, and set Local network access to Allow. If the permission is missing, reset permissions for the site, reload OVIS Web, and search again.
The USB picker stays open
The picker only authorizes an uninitialized device. Cancel it when connecting an initialized OVIS. Network discovery and any results already found remain available.
The device appears in search but will not connect
Use Retry connection first. If the same address still fails, check device power, the USB/NCM cable, and the host-side 192.168.X.2 interface. The manual IP field can verify a known target without another full scan.
No devices were found
Check device power and the local network permission in Chrome or Edge. An uninitialized device also requires WebUSB and one browser authorization. Failed requests to unrelated 192.168.X.1 addresses can appear in developer tools during a scan; they do not indicate a fault on a device that was already found.
A configuration section is missing
OVIS Web renders sections from /api/v1/config/capabilities. Check the device firmware and Manager versions. The full OSD editor requires overlay.supported: true together with the supported colors, labels, thickness range, and reticle templates.
The device goes offline after applying configuration
Video output changes and AI model tasks may reconnect the device. Keep the page open while OVIS Web searches for the same device ID. If it does not return within 90 seconds, check device power and the assigned subnet.